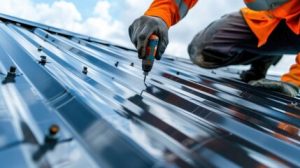
Repairing your roof is a big job, and it’s crucial that you work safely. The best way to ensure this is by working with a trusted roofing professional from the start.
Repairs are usually cheaper than replacement, and they extend your roof’s lifespan. However, recurring repairs can become expensive over time. Visit https://www.fivestarroofingandcontracting.com to learn more.
The first step in a roof inspection is to take a close look at the surface of the roofing material. This is known as a visual inspection, and it is critical to determine whether there are any areas of damage or disrepair. These could include broken or missing shingles, rotting or crumbling shingle granules, and areas of discoloration. Depending on the type of roofing material, these could be signs of moisture penetration, which can lead to structural issues and mold growth in the home.
The inspector will also pay close attention to the gutter system, checking that it is free of debris (leaves, twigs, nests, etc.) that can impede the flow of rainwater or melting snow away from the building. This is important, as water can cause severe damage to the walls and foundation of a house, if not properly directed away.
Next, the inspector will examine the attic space to look for signs of moisture. Moisture in the attic can lead to ceiling stains, musty odors, and other problems. The attic is also the perfect place to check for any leaks or other damage that may be hidden from view on the ground, such as a sagging roof or visible water damage in the ceiling.
Finally, the inspector will take a close look at the various components of the roof. This will include examining the roof vents, skylights, and other features to ensure that they are functioning properly. This is crucial for ensuring proper ventilation and preventing unwanted moisture intrusion into the structure.
After the inspection, the property owner will be able to better decide if repairs or a full replacement is needed. Small, localized problems such as a single leak or missing shingles can often be addressed with repair rather than replacement. However, if the roof has extensive damage, replacing the entire roof is typically required. This is the most cost-effective option, as it will also prevent further damage to the interior of the home.
Clean the Area
During the cleaning process, be careful to prevent any damage to surrounding shingles or underlying roofing materials. For instance, a strong detergent solution can strip protective granules from the roof and weaken its overall durability. It is also important to avoid high-pressure washing, which can dislodge shingles and cause permanent damage. It is advisable to use a leaf blower or soft-bristled broom to sweep away loose debris before applying any cleaning solution. The next step is to address any organic growth, such as moss and algae, by removing it with a brush or low-pressure water spray. This will help protect the shingles from further moisture and extend their lifespan.
If the damage is severe, such as large tears or deep cracks, it may be necessary to remove the entire damaged section of the roof. This requires a bit of expertise, but it can be done safely with the right tools and knowledge. The exposed section should be thoroughly cleaned to eliminate any debris, dirt, or leftover adhesive before the repair material is applied. It is important to ensure that the damaged area is free from moisture and fungus to minimize structural damage.
For older homes, it is particularly crucial to check for signs of leaks in attics and crawl spaces. These often indicate deeper problems with shingle seams, flashing, or other areas of the roof that need to be repaired. In addition, leaking spots can lead to mold or mildew buildup in attics and rooms inside the home, as well as staining on ceilings and walls.
Ideally, the leaks should be addressed as soon as they appear. A professional can provide lasting repairs that will save homeowners money and stress in the long run. They can apply a waterproof sealant such as EPDM Liquid Rubber to stop the leaks and prevent further damage, as well as address any other underlying issues that may be contributing to the problem. In addition, a professional can assess the damage for insurance purposes to make the claims process smoother and faster. This can be especially useful for homeowners who want to take advantage of homeowner’s insurance coverage.
Prepare the Damaged Section
A damaged roof is a serious concern that needs immediate attention. Whether it’s an isolated leak or a large hole, covering the area can help prevent further damage and keep water from infiltrating your home until permanent repairs can be made. For a quick fix, you can use a tarp or plastic sheeting. For larger openings, plywood can offer a sturdy shield while still allowing for air circulation. Before deciding on a temporary cover, it’s important to inspect the extent of the damage and determine the proper repair method.
Look for cracks, holes, or missing shingles in order to determine the severity of the issue and how extensive the repairs will be. Also check for rust, corrosion, or peeling in the flashing around chimneys, roof vents, pipes, or skylights. The flashing is designed to create a tight seal, so any gaps or cracks can allow water to infiltrate the roofing system.
When assessing the damage, it’s also helpful to photograph the entire roof and the surrounding area. This will provide clear, detailed documentation of the damage and can be useful in filing insurance claims. The photographic evidence will also help the insurance company understand the scope of the repair project and the amount of damage.
If the underlying components of the drip edge are still intact, you can repair the hole by installing new drip edges. First, remove the old shingles and underlayment using a pry bar. You can also use a claw end of a hammer to remove any nails that didn’t come out with the shingle.
For more extensive damage, you may need to replace the damaged roof panel or section of the eaves. This will require removing the rear top molding, and loosening the side moldings to access the interior of the roof. For this type of repair, it’s recommended that you work with a professional to ensure the safety and quality of the installation process.
If you need to cover a leak while waiting for a repair team, consider using a tarp that’s designed specifically for this purpose. It should be heavy-duty, waterproof, and have a reinforced edge to keep it from tearing or ripping under tension. For optimal protection, the tarp should extend 2-3 feet past the affected area and should overlap the roof’s ridges. For a more secure fit, you can attach the tarp with roofing nails or screws with washers.
Apply the Patch
The patch repair process can be a great DIY solution for homeowners. It’s typically best for small punctures, tears or blisters in the roofing membrane that are causing roof leaks. For this type of roof repair, you’ll need the following materials:
Before beginning any work on your roof, make sure that you are using proper safety precautions. Wearing a harness, securing your ladder and working in good weather are important to ensure that you do not get injured while working on your roof. The next step is to test the suspected leaky area for water intrusion. You can use a garden hose to simulate rainfall on the roof. Direct the hose to the left and then right of the leak site. Let the hose run for a few minutes and watch for any signs of water penetration. Once you have determined that the leaking section is isolated, it’s time to move forward with a patch repair.
To begin repairing the damaged section, first, apply a bead of roofing sealant to the area. Be careful to use the correct thickness of the sealant. You don’t want the sealant to be too thin or too thick because this could compromise your roof’s waterproof integrity. Next, apply your patch to the affected section of the roof. Be careful to position the patch so that it fully covers the hole. Finally, smooth out the sealant with a putty knife and remove any excess. Once the sealant has dried completely, you should be able to enjoy a leak-free roof.
Patching is a great solution for addressing leaks that are limited to a small area, but it’s not the ideal repair method for more extensive or widespread problems. If you are experiencing multiple leaks throughout your home, a full roof replacement may be a better option for your home’s protection.
A roof inspection from a professional roofer is the best way to identify leaks and other issues that might require more comprehensive repairs.